
Using Automator on Mac to publish my Obsidian notes on Github
Syncing Obsidian Notes with GitHub Using Mac Automator
Obsidian is a powerful note-taking app for Mac that allows users to create notes. The most exciting thing about Obsidian is that it stores notes on our own devices so that we can access them quickly, even offline.
However, since I am mostly working on the company's laptop, it's very important to create a backup because you never know when you might lose access to your laptop 😬
Therefore, I tried creating a simple and effective solution to keep publishing notes on GitHub whenever you want to do so, using Automator (an app on Mac).
⚔️⚔️⚔️ Before jumping to the steps, make sure you initialize your Git repository and set its remote to the appropriate GitHub repository.
Following are the steps I followed to publish my notes:
Step 1: Creating the Automator Workflow
- Launch the Automator app on your Mac.
- Choose "New Document" and select "Workflow" as the document type.
- In the left sidebar, search for "Run Shell Script" and double-click on it to add it to the workflow area.

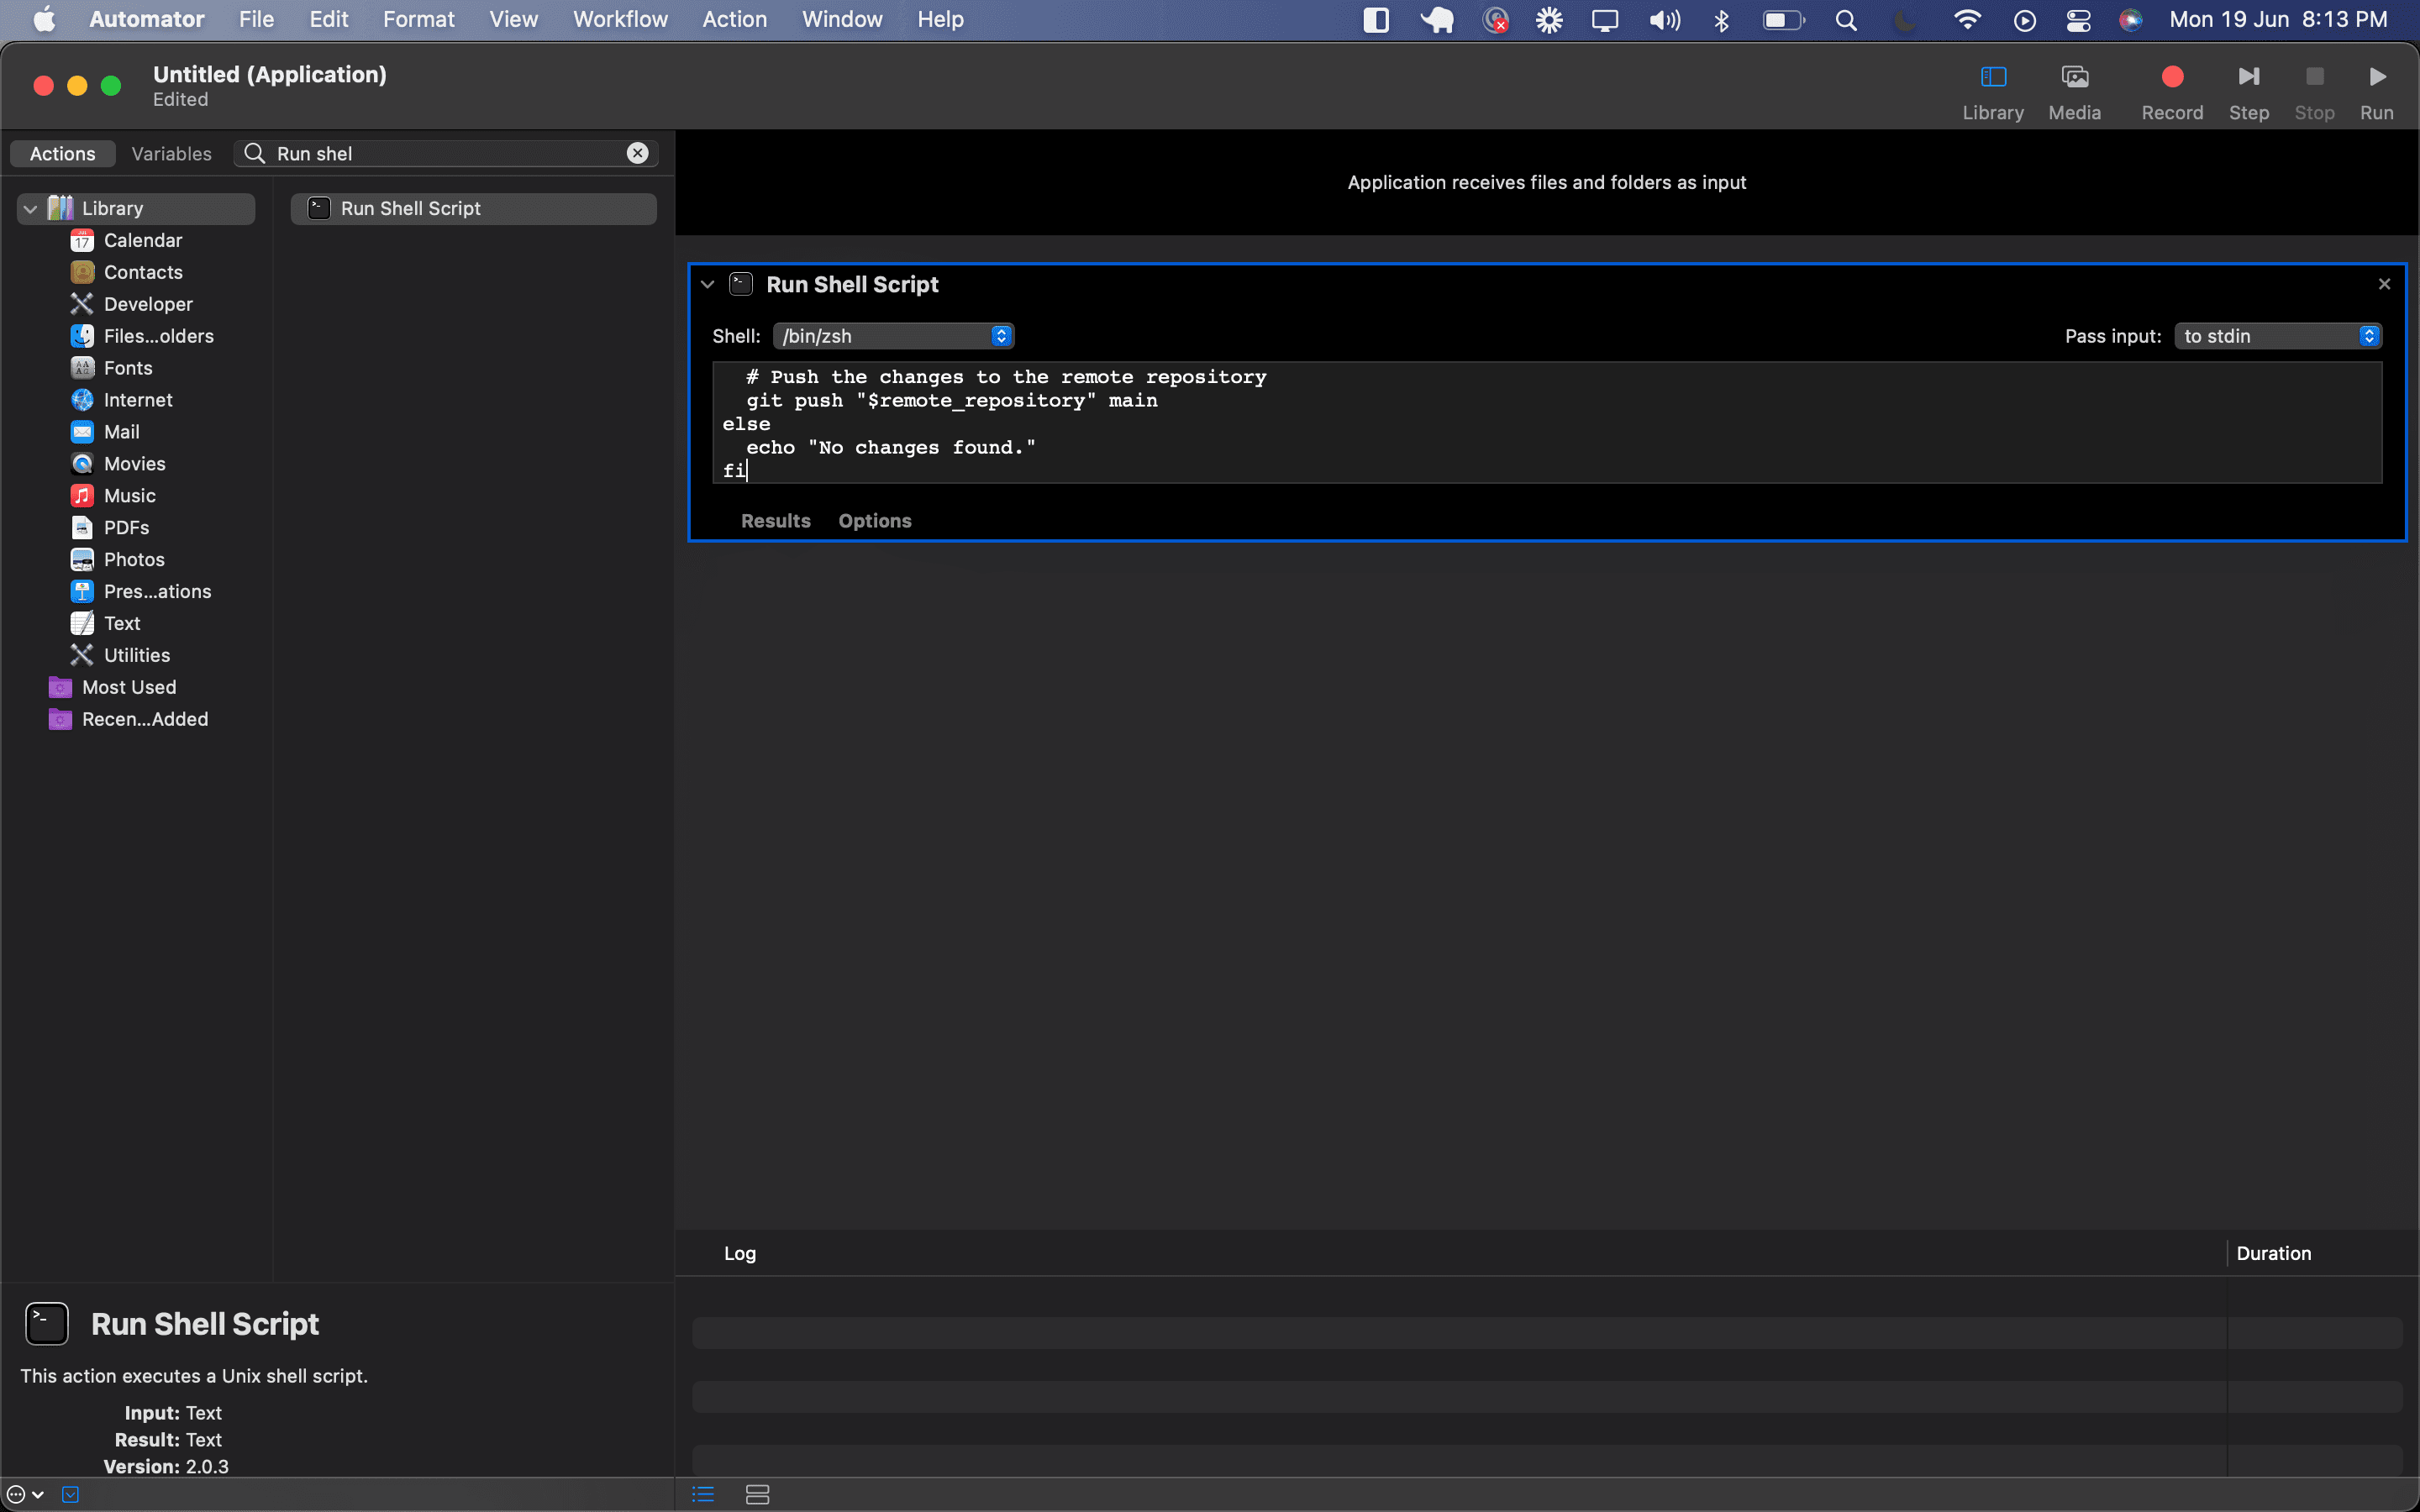
Step 2: Configuring the Shell Script Action
- In the "Run Shell Script" action, set "Shell" to "/bin/zsh" or "bin/bash" depending on the shell you use.
- Select "Pass input" as "to stdin" from the dropdown menu.
- Replace the default script with the following code:
#!/bin/zsh

# Set the path to your local Git repository
repository_path="Development/Headout/Headout_Obsidian/"

# Set the name of the remote GitHub repository
remote_repository="origin"

# Move to the repository directory
cd ~/
cd "$repository_path" || exit

# Check if there are any changes
if git status --porcelain | grep -q .; then
  # Add all changes to the staging area
  git add -A

  # Commit the changes
  git commit -m "Automatic commit"

  # Push the changes to the remote repository
  git push "$remote_repository" main
else
  echo "No changes found."
fi
Step 3: Saving and Running the Workflow
- Save the workflow by clicking on "File" and selecting "Save...".
- Provide a name for the workflow, such as "Publish Obsidian Notes to GitHub".
- Optionally, you can save it in the "Applications" folder to easily access it later.
- To run the workflow, double-click on the saved file, or you can also assign it a keyboard shortcut for quick access. Voila 🚀 You just published your notes to Github.
Automating with Calendar
Additionally, if you want to periodically run the workflow, you can use Calendar app:
- Open the "Calendar" app on your Mac.
- Create a new event or edit an existing one.
- Add an alert for the event and set it to "Custom".
- Select the "Open File" option and choose the Automator workflow file you saved in Step 3.
- Set the desired date and time for the event.
- Repeat this process for each time you want your notes to be published to GitHub automatically.
With the automated workflow triggered by Calendar alerts, you can ensure your notes are regularly backed up and accessible across devices. However, I later found some interesting plugins that help us achieve a lot more than just automation.